
The liquid foundation manufacturing process consists of several tightly controlled stages, from raw material preparation and pigment dispersion to emulsification, filling, and final quality control. Poor dispersion or emulsion stability can lead to problems such as uneven color, separation, or changes in texture, which may result in rejected batches and additional production costs.
This step-by-step breakdown examines the critical control points, from raw material staging to final quality assurance. It covers pigment dispersion, phase preparation, emulsification, homogenization, filling, and stability testing, with attention to the process variables that affect color consistency, texture, and product stability. The goal is to provide a practical framework for understanding how liquid foundation is manufactured consistently at commercial scale.
What Makes Liquid Foundation Different from Other Cosmetics
Liquid foundation is a color-managed emulsion. Its complexity comes from having to balance precise shade, texture, coverage, and stability within a relatively complex formulation system.
A Stable Emulsion System
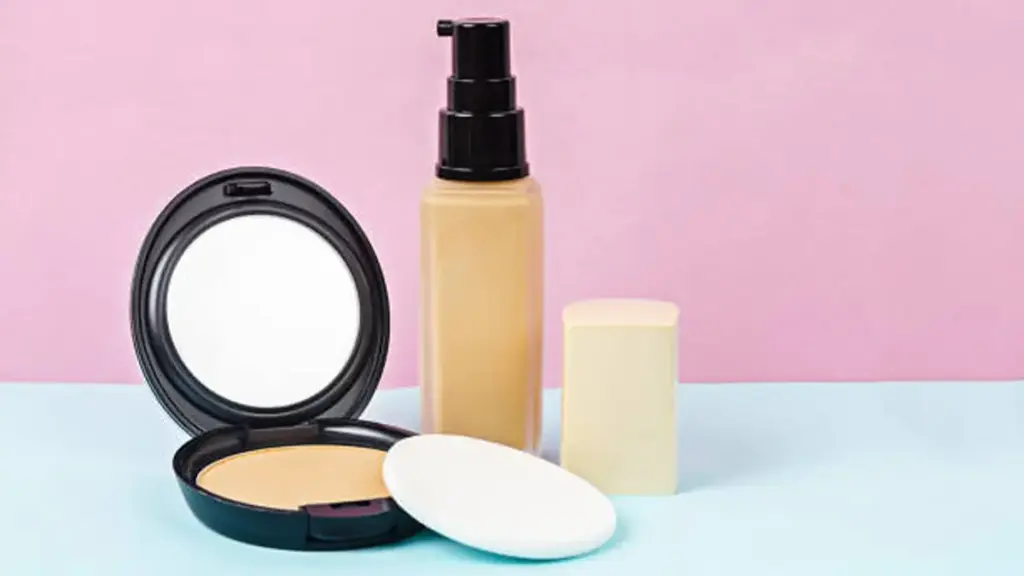
Liquid foundation is typically a complex emulsion or dispersion system, with formulations commonly based on oil-in-water (O/W), water-in-oil (W/O), or silicone-based systems. This structure combines ingredients like oils and water that don’t naturally mix. Unlike anhydrous products like lipstick or simple dry powders, this system requires a careful balance of emulsifiers and stabilizers to prevent the phases from separating over time. Because it contains water, the formula also needs preservatives to stop microbial growth and ensure the product remains safe and stable on the shelf.
Engineered for Precise Skin Matching and Coverage
The primary job of foundation is to create an even, consistent skin tone. This means pigment ratios are tightly controlled to match an extensive range of complexions, a level of color precision not required for mascara or eyeliner. The formula is built to provide controlled coverage and blendability across a large surface area. Its texture and viscosity are specifically engineered to balance smooth application with the staying power needed for a consistent finish that lasts.
Step 1: Raw Material Preparation
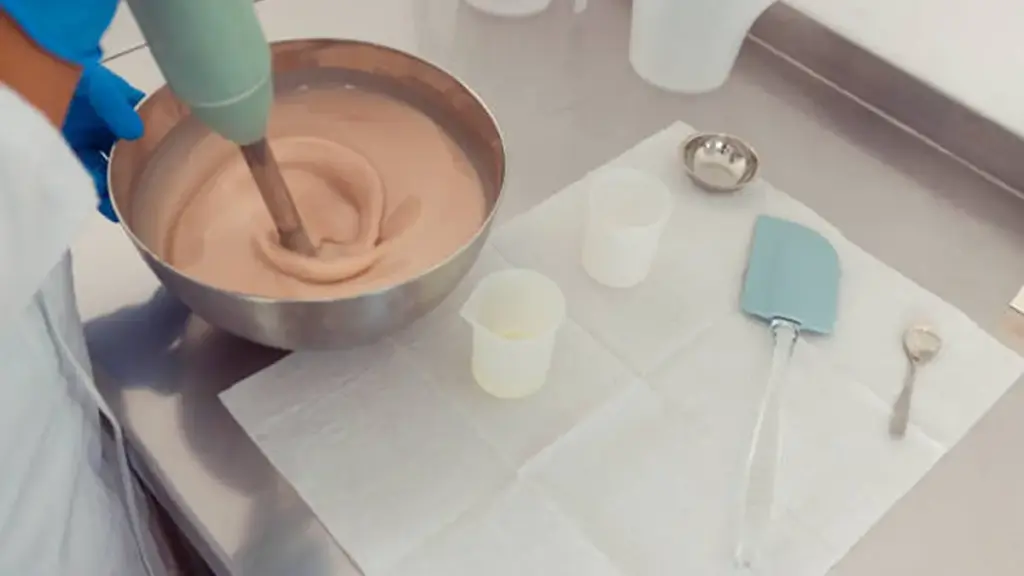
This step prepares the individual raw materials for production. Pigments, oils, water-soluble ingredients, and functional additives are weighed, checked, and staged according to the formulation before mixing begins.
Pigmenten
This is the stage where mechanical shear is used to break down pigment agglomerates and achieve a uniform dispersion. Formulators typically use pigments such as iron oxides and titanium dioxide to build skin tones and control coverage, with the specific pigment system depending on the shade and formula. These powders are weighed with precision and often pre-processed by grinding or dispersing them into a portion of the oil phase. This creates a uniform color paste, which is the key to preventing streaking later on. We run quality checks on particle size and color strength here to ensure the final product has a smooth texture and consistent shade from batch to batch.
Oils and Emulsifiers
The texture and stability of the foundation depend on this group. A specific blend of oils—whether natural, synthetic, or silicone-based—is chosen to manage the product’s spreadability and finish. Emulsifiers and stabilizers are then selected to build a stable oil-in-water or water-in-oil system, which stops the formula from separating on the shelf. In production, oil-soluble ingredients are combined and heated in one vessel, while the water-soluble components are prepared in a separate tank, staging them for the emulsification process.
Functional Ingredients
These are the ingredients that deliver specific performance benefits. Humectants improve skin hydration, film-formers increase wear time, and sensory modifiers enhance the application feel. We also add preservatives, antioxidants, and pH adjusters to ensure the formula is safe, stable, and has a long shelf life. Any heat-sensitive components, like certain skincare actives, are carefully staged for addition during the cooler manufacturing phases. This protects their effectiveness in the final product.
Launch Your Private Label Foundation Line.
Step 2 Pigment Dispersion and Milling
This is where brute force meets formulation science. We use high-energy milling to smash pigment clumps into fine particles, which is important for achieving smooth application and uniform color.
Dispersion Mechanisms and Key Equipment
This step uses raw mechanical energy—shear and impact—to physically break down pigment agglomerates. These are just loose clusters of pigment powder. If they are not adequately dispersed, the foundation may show grittiness, streaking, uneven coverage, or inconsistent color. The goal is to get these clumps down to the fine, primary particles needed for a uniform shade and smooth feel.
The equipment choice depends entirely on the formula’s thickness and how much pigment you’re loading in. For more fluid, liquid bases, a high-shear rotor-stator mixer can do the job. But for the thick, high-solids pigment pastes common in full-coverage foundations, you need the intense shear of a three-roll mill to get the job done right.
Critical Process Parameters and Quality Control
Several variables are tightly controlled to get a consistent grind without damaging the formula. Milling time, energy input, and temperature are the main levers. You need enough energy to break the particles down, but too much heat can degrade the oils or other sensitive ingredients in the base. It’s a carefully managed process, not just a simple mix.
In-process checks are essential to know when the dispersion is finished. The standard tool for this is a Hegman gauge, also called a grind gauge. We spread a sample of the pigment paste down a channel on the gauge to check for coarse particles. The target fineness depends on the pigment system and formula, and a Hegman gauge is used to verify that the dispersion meets the required specification. This simple check ensures the final product has no grittiness or color streaking.
Step 3 Emulsion Preparation
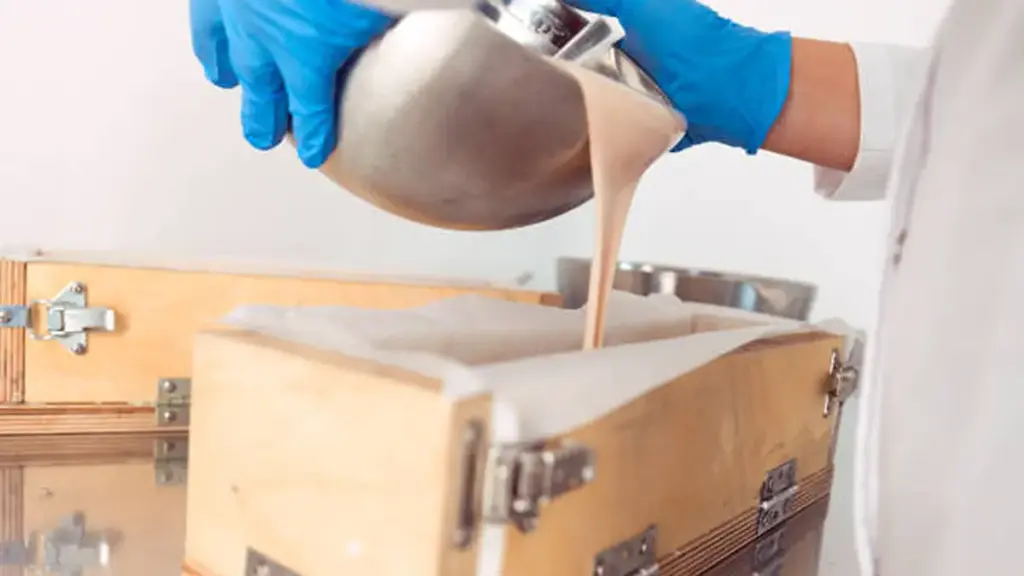
This step involves preparing separate oil and water phases, then combining them under precise temperature and shear conditions to create a stable, uniform liquid foundation.
Oil Phase
The oil phase is the mixture of all oil-soluble ingredients. This includes everything from emollients and silicones that provide skin feel and slip, to waxes and fatty alcohols that build structure. Pigments, which are often pre-dispersed in an oil carrier, are also part of this phase.
For hot-process formulas, the oil and water phases may be heated to a formulation-specific temperature, often around 70–75°C. The selected temperature should be sufficient to melt the relevant waxes, emulsifiers, or other heat-dependent ingredients used in the formula. The mixture is stirred until it becomes completely uniform. Any pigments are dispersed using high-shear mixing to break apart clumps and distribute the color evenly before it meets the water phase.
Water Phase
The water phase contains all the water-soluble ingredients. This starts with purified water and includes humectants like glycerin to add hydration, along with stabilizers such as xanthan gum or carbomer to build viscosity and suspend the pigments once the emulsion is formed.
Any polymers or gums must be fully dissolved and hydrated to activate their thickening properties. In a typical hot-process system, this phase is heated to the same temperature as the oil phase. For hot-process emulsions, bringing the phases to compatible temperatures helps prevent premature solidification of waxes or other temperature-sensitive components during mixing.
Emulsification Process
Emulsification is where the oil and water phases are combined to form the final foundation base. This is done using high-shear mixing or homogenization, which applies intense mechanical force to break down the oil droplets into a very small, uniform size. This creates a stable structure that prevents the oil and water from separating over time.
The order of addition—whether oil is added to water or water to oil—is carefully controlled based on the formula and emulsifier system. Once the emulsion is formed, it is cooled down under continuous, gentle mixing. This controlled cooling sets the structure properly. Heat-sensitive ingredients, like certain preservatives, antioxidants, or skincare actives, are added during this cool-down phase to avoid degradation.
Step 4 Homogenization and Deaeration
This step focuses on refining the emulsion and removing entrapped air before the foundation moves to filling and packaging.
| Process | Key Objectives & Parameters |
|---|---|
| Homogenization |
|
| Deaeration |
|
Homogenization: Refining Emulsion and Pigment Dispersion
After emulsification, homogenization further reduces the size of oil droplets and remaining pigment agglomerates to improve the uniformity of the foundation. The process uses intense mechanical force from a rotor-stator or high-pressure system to break down oil droplets and any remaining pigment clumps into much smaller, uniform sizes. The resulting dispersion also helps maintain consistent pigment distribution, which supports uniform color and coverage. It also ensures pigments are evenly distributed, which is key for consistent color and coverage.
Deaeration: Removing Air for Stability and Fill Accuracy
High-speed mixing and powder handling can introduce air into the batch, which may affect appearance, filling accuracy, and product stability. This trapped air is a major problem. It can cause foam, promote oxidation, and destabilize the emulsion. On the production line, air bubbles lead to inaccurate fill volumes, meaning customers get less product and you get compliance headaches. Deaeration solves this by putting the entire batch under vacuum. The reduced pressure causes air bubbles to expand and rise to the surface, where they can be removed. Modern production setups often perform deaeration and homogenization in the same vacuum-rated emulsifying vessel. This integration streamlines the process, removing air as the emulsion is being refined, which results in a dense, stable, and fill-ready product.
Step 5 Filling and Packaging
This stage converts the bulk foundation into the finished product. The main controls are fill volume, container sealing, labeling, and traceability. Each of these needs to remain within the specified production tolerances before the product is released.
Filling Operations and Primary Sealing
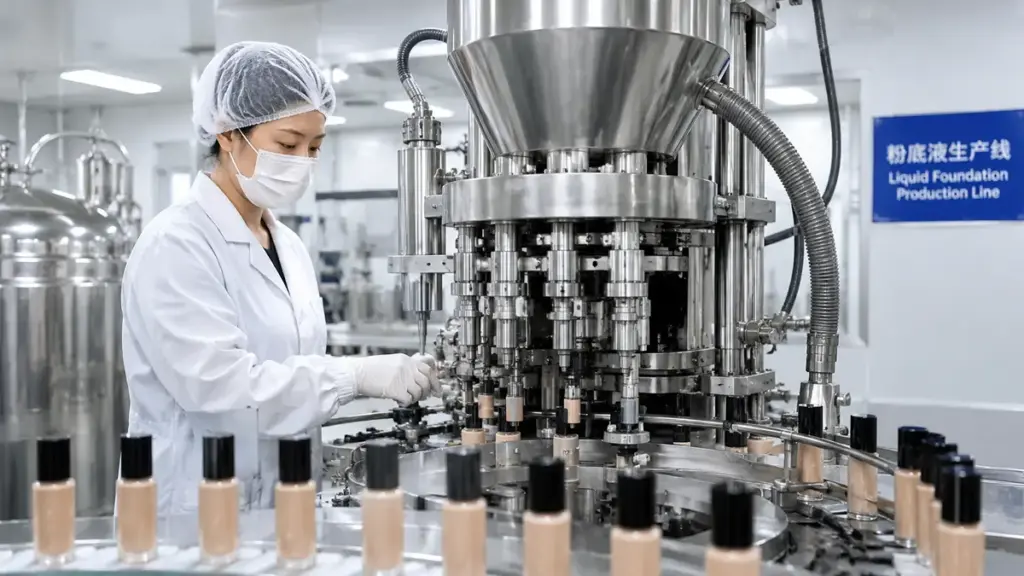
Once the bulk foundation passes QC, it’s pumped to a holding tank that feeds the filling line. These tanks often have gentle agitators to keep pigments suspended and ensure the first bottle is identical to the last. The choice of filling equipment hinges on the foundation’s viscosity. For medium- to high-viscosity foundations, positive-displacement filling systems such as piston fillers may be used to achieve accurate and repeatable fill volumes.
The filling process itself is tightly controlled. Nozzles often fill from the bottom of the container up to minimize air bubbles and foaming. Fill speed and volume are calibrated and constantly checked. After filling, the container moves to capping. Automated cappers apply pumps or caps and tighten them to a specific torque range. Too loose, and it leaks; too tight, and the cap can crack. Torque is checked at regular intervals to ensure consistent sealing without damaging the container or closure. For packaging systems that require it, an induction seal or other tamper-evident closure may be applied before final capping.
Labeling, Final Packaging, and Quality Assurance
After sealing, units are labeled. Labels carry the product name, shade, ingredient list, and other required information. Most importantly, a lot code and sometimes an expiry date are printed on the container or label. This code is the key to traceability, linking a single bottle back to its specific production batch, raw materials, and packaging components. Automated vision systems often scan each unit to verify the label is present, correctly positioned, and has a legible lot code.
Many foundations are then placed into a secondary package, like a printed carton, which protects the primary container and adds shelf appeal. The process is monitored from start to finish. In-line quality checks are constant. Operators pull units off the line to verify fill weight, cap torque, and seal integrity. These checks are documented in the batch packaging record. Nothing gets released until every specification is met, ensuring the final product is stable, safe, and consistent.
Step 6 Quality Control and Stability Testing
This step confirms every batch meets specifications for color, texture, and safety, ensuring the product remains stable from the production line to the customer’s shelf.
In-Process and Finished Product Quality Control
Quality control isn’t just a final check; it’s embedded throughout the process. We test the bulk foundation before it ever hits a filling line. This includes visual checks for homogeneity—no separation, lumps, or air bubbles. We also run a battery of physical and chemical tests to confirm the batch is on-spec. This means verifying pH, measuring viscosity with a rheometer, and using a spectrophotometer to ensure the color matches the master standard within tight tolerances.
Once the foundation is filled and packaged, a second round of QC begins. We inspect finished units for correct fill levels, leaks, and proper cap or pump function. Microbiological testing is an important part of quality control for water-containing cosmetic formulas. Testing may include total microbial counts, yeast and mold, and specified microorganisms according to the product and applicable requirements. Batches are released only after the required quality specifications have been met.
For brands developing vloeibare foundation at scale, manufacturing consistency depends on more than the formula itself. Siloran combines formulation development, controlled production, and quality management within one manufacturing operation. The company has a 50-person R&D department and a 40,000-square-meter production facility, supporting product development and large-volume manufacturing under established production controls. Its production areas include dedicated workshops for daily chemical products, powder, lip makeup, and other cosmetic operations, while automated filling and packaging equipment supports repeatable production. The facility also operates a GMP cosmetic 100,000-class cleanroom and maintains GMPC and ISO22716 certifications listed in its company information. This structure allows brands to work with a manufacturer that can coordinate formulation, production, filling, and quality control as the product moves from development to commercial scale.
Long-Term Stability and Shelf-Life Validation
Stability testing provides evidence that a foundation can maintain its intended quality over time and helps support the proposed shelf life. Stability studies evaluate the product’s physical, chemical, and microbiological integrity over time and under various conditions. These tests are essential for catching potential failures before a product launch.
The main types of stability studies include:
- Real-Time Stability: Finished products are stored under defined, intended storage conditions and evaluated at set intervals over an appropriate period to monitor changes in appearance, color, odor, pH, viscosity, and other relevant attributes.
- Accelerated Stability: Samples may be stored under elevated-temperature conditions selected according to the formula, packaging, and stability protocol. The approach can help identify potential issues such as phase separation, color change, or viscosity drift earlier in development.
- Stress Testing: This is about intentionally abusing the formula to find its breaking point. We subject samples to multiple freeze-thaw cycles and run them through a centrifuge to see if we can force the emulsion to separate. It’s a fast way to screen out weak formulations early in development.
- Compatibiliteitstesten: We also verify the foundation doesn’t interact negatively with its packaging. This ensures the formula doesn’t cause the bottle to discolor or swell, and that the pump or cap remains functional throughout the product’s life.
Across all these studies, we monitor key parameters: visual appearance, color, odor, pH, viscosity, and microbial counts. A product only passes if all attributes remain within the specified acceptable range for the entire testing period.
Frequently Asked Questions
What is the liquid foundation manufacturing process?
The liquid foundation manufacturing process is a precise workflow used to create a stable oil-and-water emulsion. It typically involves grinding pigments for uniform color, preparing separate oil and water phases, heating them, and then combining them with high-energy mixing. The mixture is then cooled so that heat-sensitive ingredients like preservatives can be added. After final quality checks, the foundation is filled into its packaging.
What machinery is used to mix liquid foundation at a large scale?
Large-scale production primarily uses a Vacuum Emulsifying Mixer. This machine combines a high-shear homogenizer for creating a smooth emulsion, a vacuum system to remove air bubbles, and a jacket for precise heating and cooling. Other common equipment includes high-shear batch mixers for pre-dispersing pigments and planetary mixers for very thick, cream-like formulas.
Why does some foundation separate into layers after sitting?
Foundation separates because it’s an emulsion of oil, water, and pigments that can lose stability over time. This happens when the formula lacks enough emulsifiers to hold oil and water together, or if the liquid is not thick enough to keep heavy pigments suspended. Temperature changes during shipping or storage can also weaken the emulsion, causing visible layers of oil or water to form.
What is high-shear homogenization in cosmetic factories?
High-shear homogenization is an intense mixing process that uses a rotor-stator head spinning at high speed to break down particles and droplets. This action creates extremely fine, uniform dispersions. In foundation manufacturing, it is essential for blending oil and water into a stable emulsion, ensuring a smooth texture and consistent color without any grittiness from pigment clumps.
How do manufacturers keep air bubbles out of heavy foundation liquids?
Manufacturers use a combination of specialized equipment and controlled processes. The primary method is mixing the foundation in a vacuum-sealed vessel, which pulls air out of the product as it’s being mixed. They also use gentle, low-turbulence agitators that fold ingredients together without whipping in air. During packaging, filling nozzles often dispense the product from the bottom of the container up to prevent trapping air.
What are the hygiene and cleanroom requirements for liquid makeup production?
Liquid makeup production follows controlled hygiene and manufacturing practices under a cosmetic GMP system. Depending on the facility and production requirements, controlled cleanroom areas, personnel hygiene procedures, protective clothing, environmental controls, and documented cleaning and disinfection procedures may be used to reduce contamination risks. Equipment and production areas should be maintained and cleaned according to documented procedures.
Laatste gedachten
The liquid foundation manufacturing process is designed to control the main variables that affect product quality, including pigment dispersion, emulsion stability, viscosity, color, and microbial quality. Inconsistent processing can lead to separation, shade variation, or other defects, which may increase production costs and affect the finished product.
Understanding the process is the first step; validating it is the next. We recommend a full factory audit or starting with a pilot batch to see this precision firsthand. Contact our production specialists to discuss your formula and scaling requirements.