
Eye makeup changes how your eyes read — wider, sharper, softer — without touching the rest of your face. Whether you want a quiet everyday look or something bolder for an evening out, the same fundamentals carry both.
If you are new to it, or your results keep smudging by lunchtime, this 101 guide walks through how to do eye makeup in the order most makeup artists actually use: prep, brows, shadow, liner, mascara. We also cover eye-shape adjustments, the mistakes behind most disappointing results, and what to look for if you are building your own eye makeup line.
Prep Your Kit and Your Eyelids
You do not need a full professional case to learn how to do eye makeup well. Six items cover every look in this guide.
- Eye primer — the item most beginners skip, and the main reason shadow creases within hours on oily lids.
- Three eyeshadow shades — one transition shade slightly deeper than your skin tone, one lid colour, one deep shade for the outer corner.
- A flat shader brush and a fluffy blending brush — pat colour on with the flat brush, soften edges with the fluffy one.
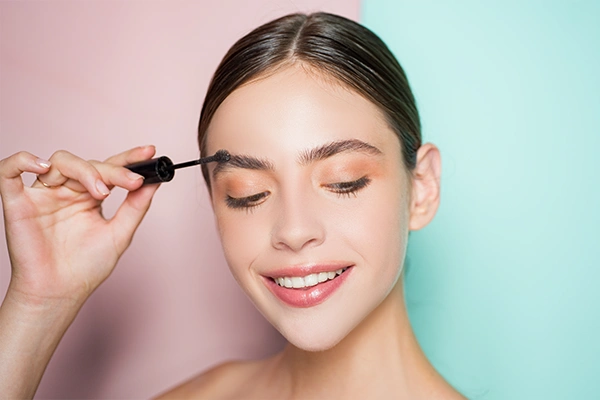
- Brow pencil, spoolie, and an angled brush — for grooming hairs and breaking up harsh lines.
- Eyeliner in one format — pencil for a soft line, liquid for a crisp one, gel for both.
- Mascara and an eyelash curler — pick the mascara by the effect you want; lengthening and volumising formulas behave differently.
Sourcing for a brand rather than a personal kit? Shade range and finish are where first palettes succeed or fail — see pressed and cream eyeshadow production.
Prepare the Lid Before Any Colour
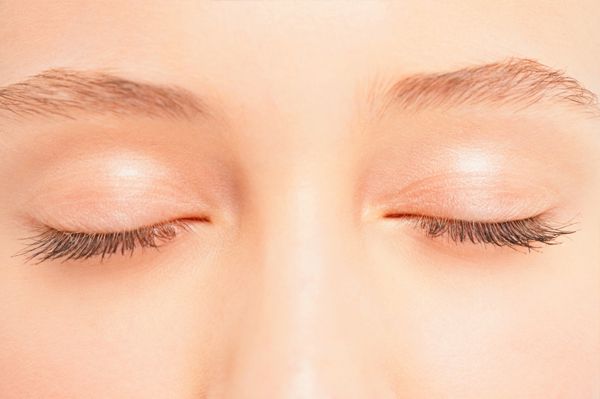
A prepped lid holds pigment longer and blends more evenly. Three steps matter most:
- ReinigenVerwijder vuil en eventuele resten van make-up van uw oogleden met een milde oogmake-upremover of een milde reiniger.
- Hydrateren: Hydrateer de tere huid van uw oogleden met een lichte oogcrème of vochtinbrengende crème die geschikt is voor uw huidtype.
- Inleiding: Apply an eye primer to create a smooth base, even out skin tone, and support the vibrancy and longevity of your eyeshadow.
Give the primer about thirty seconds to set before colour goes on — a still-tacky base grabs powder unevenly and turns a blend patchy.
How to Do Eye Makeup: Five Core Steps
Run the same sequence every time — brows, then eyeshadow, then eyeliner, then mascara. Keeping the order consistent is what makes how to do eye makeup quicker with each pass: loose shadow falls onto a finished liner line and smudges it.
How to Draw Eyebrows?
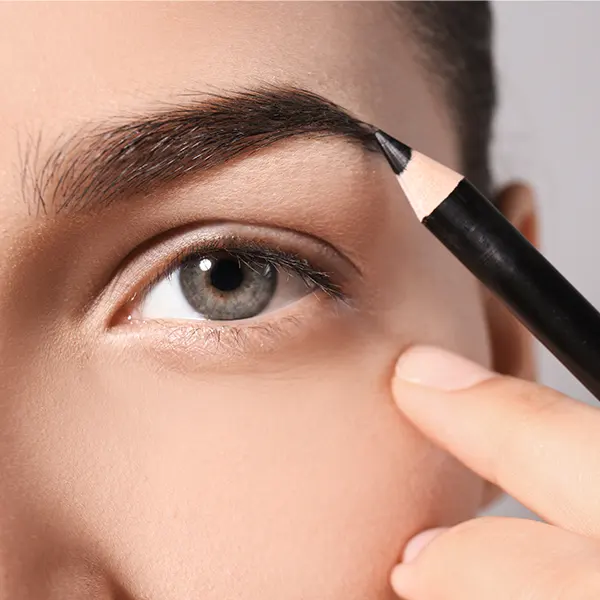
Eyebrows frame and define the eyes, and they set the proportions everything else sits inside. Here’s how to draw eyebrows:
- Bepaal de vormBegin met het beoordelen van je natuurlijke wenkbrauwvorm en bepaal de gewenste wenkbrauwvorm die bij je gezicht past. Gebruik een wenkbrauwborsteltje of kam om je wenkbrauwhaartjes omhoog te borstelen.
- Schets de vorm: Gebruik van een wenkbrauwpotlood Of met een wenkbrauwpen met een fijne punt, omlijn je de onderkant van je wenkbrauw. Begin bij de binnenste ooghoek, volg de natuurlijke vorm, en bepaal de boog en het uiteinde. Vul eventuele dunne plekjes in met lichte, veerachtige streepjes, die lijken op haar.
- Vul de wenkbrauwen in: Gebruik hetzelfde potlood of dezelfde wenkbrauwpen om de wenkbrauwen in te vullen met kleine, opwaartse bewegingen. Begin vanuit de binnenste ooghoek en werk geleidelijk naar de punt toe. Pas de druk op het potlood of de pen aan voor een natuurlijk verloop, met een zachtere start en een meer gedefinieerde boog en punt.
- Mengen en fixeren: Voor een natuurlijkere look kun je een wenkbrauwborsteltje gebruiken om de kleur te blenden en de wenkbrauwen te stylen. Gebruik indien nodig een transparante of getinte wenkbrauwgel om de haartjes te fixeren en textuur toe te voegen.
- Aanpassen aan verschillende gezichtsvormenHoud er rekening mee dat verschillende gezichtsvormen mogelijk een kleine aanpassing van de wenkbrauwvorm vereisen. Zo kunnen mensen met een rond gezicht baat hebben bij iets langere wenkbrauwen, terwijl mensen met een hoekig gezicht wellicht kiezen voor zachtere, gebogen wenkbrauwen.
Well-defined brows support the rest of the look. If your strokes come out hard rather than hair-like, how to apply eyebrow pencil for beginners covers the angle and pressure in detail.
Hoe breng je oogschaduw aan?
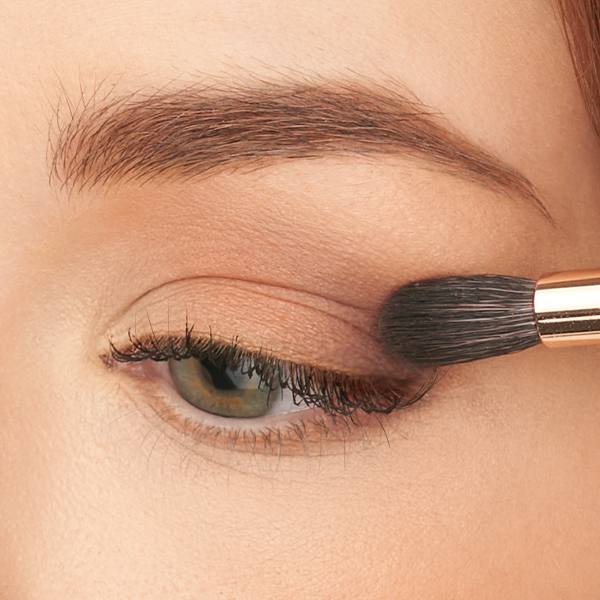
Toepassen oogschaduw is where a look earns its depth. Follow these steps for a defined eye:
Tinten selecteren
- Begin met een overgangskleur. Dit is een kleur die iets donkerder is dan je huidskleur en die je kunt mengen met andere tinten.
- Kies een kleur voor je oogleden. Dit kan een matte of glanzende tint zijn die past bij de kleur van je ogen.
- Voor een extra dimensie selecteert u een donkerdere tint voor de vouw om diepte en definitie te creëren.
Mengen en lagen
- Breng de overgangskleur met een zachte blendkwast aan op de arcadeboog en blend naar boven.
- Dep vervolgens de ooglidkleur over het hele ooglid, met de nadruk op het bewegende deel van het ooglid.
- Gebruik een kleiner kwastje om de donkere tint aan te brengen op de buitenste ooghoek en vervaag deze in de plooi.
- Blend the edges of the shades together so no single line sits visibly on its own.
Hoe breng je eyeliner aan?
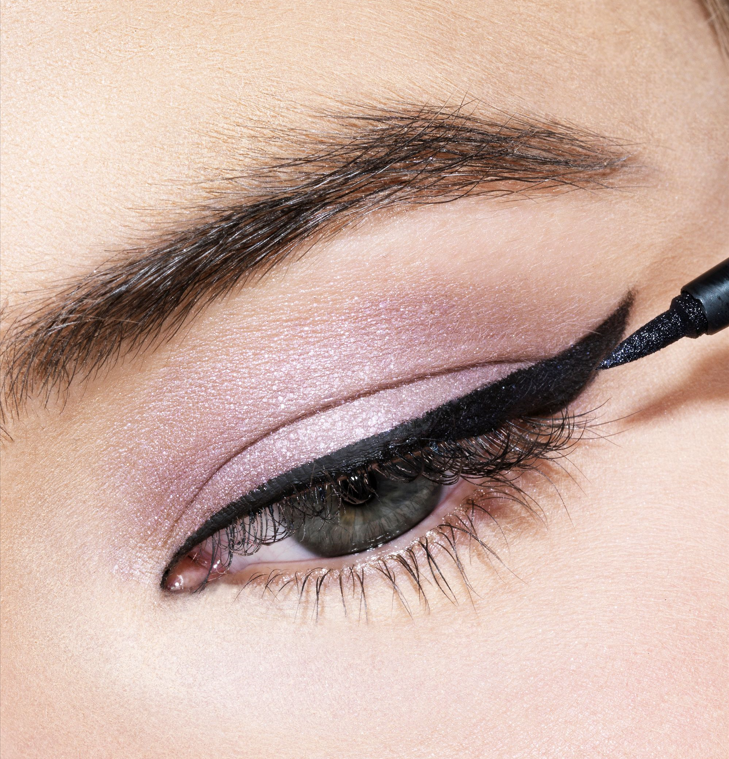
Eyeliner geeft je ogen definitie en drama. Zo breng je het aan. oogpotlood effectief:
Eyeliner-technieken
Er zijn verschillende soorten eyeliner waaruit u kunt kiezen, zoals potlood-, vloeibare- en gelliners. Potloodliners zijn geweldig voor een zachte, vloeiende look. Vloeibare eyeliners zorgen voor precieze en gedefinieerde lijnen. Gel eyeliners bieden veelzijdigheid en kunnen zowel zachte als gedurfde lijnen creëren. De juiste eyeliner kiezen want de vorm van uw ogen is essentieel voor een flatterende look.
Aanbrengen op de bovenste en onderste wimperlijn
Voor de bovenste wimperlijnBegin bij de binnenste ooghoek en werk naar buiten toe, zo dicht mogelijk bij de wimperrand. Gebruik kleine, korte streken voor een vloeiende lijn. Trek de lijn iets verder door dan de buitenste ooghoek om een winged eyeliner of cat-eye-look te creëren, indien gewenst. Voor de onderste wimperlijn, apply the eyeliner sparingly to the outer two-thirds of the lash line for a more balanced look. Give liquid liner twenty or thirty seconds to set before the eye fully opens — a still-wet line transfers to the upper lid.
Hoe breng je mascara aan?
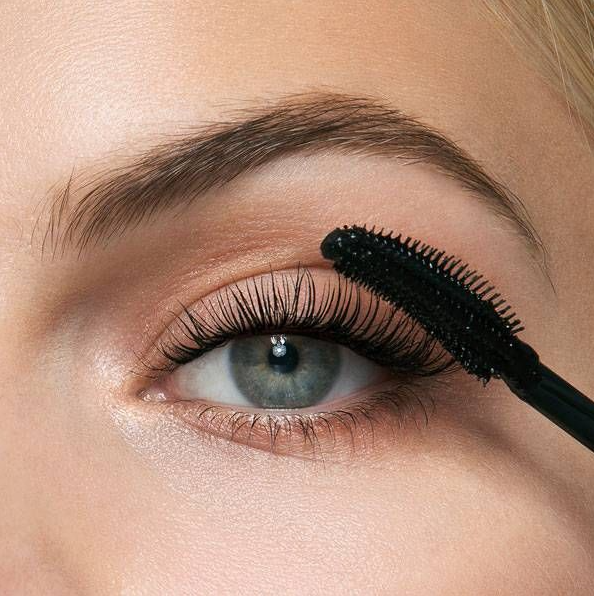
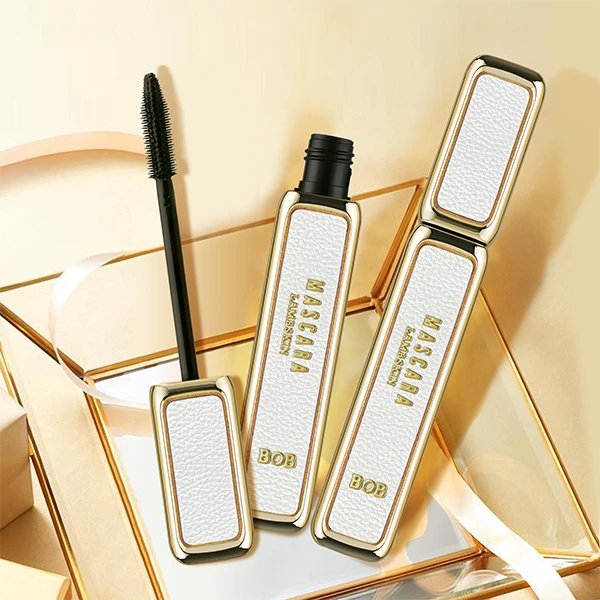
Mascara enhances lashes and opens up the eyes. Follow these steps for clean mascara application:
- Begin met het krullen van uw wimpers met een wimperkruller.
- Dan, voor de bovenste Beweeg het mascaraborsteltje langs de wimperaanzet en kam het met een lichte zigzagbeweging door tot aan de puntjes. Breng indien gewenst extra laagjes aan en laat elke laag drogen voordat je een nieuwe laag aanbrengt.
- Voor de lager Houd het borsteltje verticaal en breng de mascara voorzichtig aan met korte bewegingen om klontering en vlekken te voorkomen.
De juiste mascara kiezen
Select a mascara formula that matches your desired effects.
- Verlenging Mascara's hebben meestal taps toelopende borsteltjes en rekken je wimpers uit.
- Volume geven mascara's hebben dikkere borsteltjes en zorgen voor meer volume.
- Krullen mascaras often have curved wands that lift and curl the lashes. The mascara types guide breaks down each formula and wand in detail.
How to Do Eye Makeup for Different Eye Shapes
The steps above assume an almond eye with visible lid space — the shape most tutorials default to. Hooded, monolid, and deep-set eyes need small placement adjustments, which is why the same tutorial can look sharp on one person and muddy on another. How to do eye makeup for your own shape comes down to where the colour sits, not how much of it you use.
- Hooded lids: Keep the crease shade slightly above your natural crease so it stays visible when the eye is open. Draw liner thin and build it upward rather than outward, and go easy on the lower lash line — a heavy line there closes the eye further.
- Monolid eyes: Matte shading along the upper edge adds depth that shimmer tends to flatten. A wing drawn with the eye open, or a smoked outer corner, usually reads cleaner than a thin sharp line.
- Deep-set eyes: A lighter transition shade keeps the colour visible instead of swallowing it. Stay close to the lash line rather than tightlining heavily, which can make the eye look smaller.
For liner styles matched to each shape, see which eyeliner suits which eye shape.
Two Looks Worth Practising: Smokey Eye and Cat Eye
Hoe creëer je een smokey eye-make-uplook?
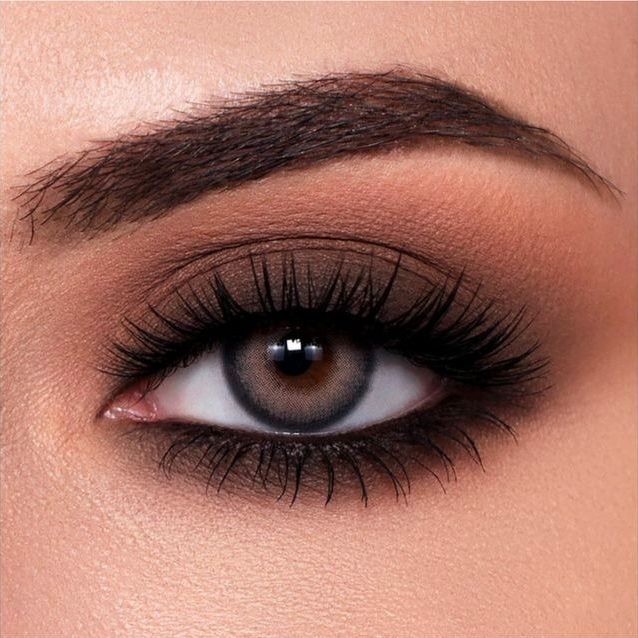
The smokey eye is a flexible technique for a softer, more dramatic effect. Here’s how to achieve a smokey eye:
Stap-voor-stap instructies
- Begin met het aanbrengen van een neutrale overgangskleur op de plooi voor diepte.
- Breng vervolgens een donkerdere tint aan op de buitenste ooghoek en veeg deze uit in de arcadeboog.
- Breng een zwarte of donkergrijze tint aan op de buitenste hoek en veeg deze uit naar het midden van het ooglid.
- Versterk het buitenste V-gebied met een diepere tint voor dimensie.
- Blend and diffuse any harsh lines so the gradient reads continuous.
Kleurselectie en intensiteit
Kies kleuren die je oogkleur accentueren en bij je huidskleur passen. Voor een klassieke smokey eye kun je kiezen voor tinten zoals zwart, grijs of donkerbruinPas de intensiteit aan door de tinten in laagjes aan te brengen en te blenden. Begin met een lichtere tint en bouw de kleur geleidelijk op om te voorkomen dat de look overheerst.
Hoe creëer je een cat-eye-make-uplook?
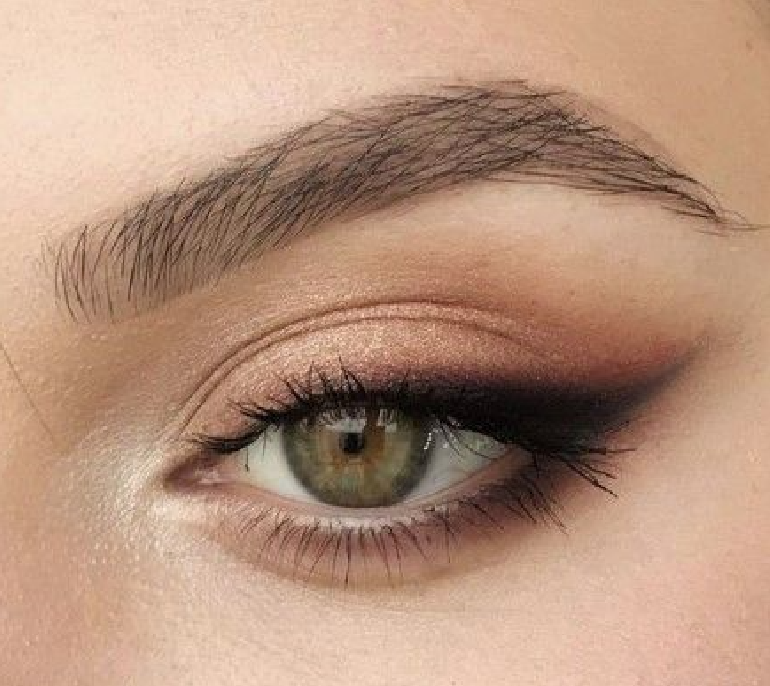
The cat eye or winged liner elongates the eyes. Here’s how to achieve a classic cat eye:
Stap-voor-stap instructies
- Begin met het tekenen van een dun lijntje aan de binnenste hoek van je bovenste wimperrand. Maak het lijntje geleidelijk dikker naarmate je naar de buitenste hoek toe werkt.
- Teken vervolgens vanuit de buitenste hoek een diagonale lijn omhoog en naar buiten, waarbij u deze iets voorbij de buitenste hoek doortrekt voor de vleugel.
- Verbind de vleugel met de rest van de lijn door een dunne lijn langs de bovenste wimperlijn te tekenen.
- Fill in any gaps and even out the line.
Tips voor beginners
If you’re new to the wing, tape or a business card angled along the wing line works as a stencil: apply the liner against it, then peel it away for a sharp edge.
Common Eye Makeup Mistakes and Easy Fixes
Most disappointing results come from the same handful of habits. Nearly all of them are fixed by how to do eye makeup in layers instead of in one pass.
- Dragging shadow across the lid with a dry brush. Powder pigment goes on by patting, then blending only the edges. Dragging from the start deposits colour unevenly and sends fallout under the eye.
- Reaching for the darkest shade first. A single deep colour has nowhere to gradient into. Build from the transition shade and reserve the darkest tone for the outer corner.
- Skipping primer on oily lids. Natural oil on the lid breaks the pigment’s grip, so shadow folds into the crease line within hours. This is the fix most people are actually looking for.
- Pumping the mascara wand in the tube. That pushes air into the formula and dries it out — which is why the mascara goes clumpy by week six. Twist it gently against the opening instead.
- Drawing a wing with the eye closed. The wing flattens once the lid lifts. Draw it looking straight ahead with the eye open, then check the angle in a relaxed gaze.
Eye Makeup Trends for 2026–2027
Eye looks are swinging back from quiet minimalism toward expressive colour. Judging by recent runways and this season’s beauty-editor coverage, these are the directions worth practising:
- Expressive colour is back. Blue eyeshadow and soft pastel lids have returned to editorial spreads — a clear signal that maximalist eye makeup is replacing the all-neutral “clean girl” lid of the early 2020s.
- Brown is the new black. Brown mascara and brown liquid liner are the low-commitment way into the trend: they soften most eye shapes and read more natural than pure black on fair and medium skin tones.
- The ’90s smoky eye, softened. Blurred, low-contrast smoky looks are replacing harshly cut creases. Blend with a fluffy brush and keep the darkest tone in the outer third.
- Creative liner shapes. Double wings, floating crease liner and unexpected colour liner all appeared on recent runways — the classic cat eye is now one option rather than the default.
- Deliberately undone texture. Clumpy mascara and smudged liner showed up across fall and winter shows. The lesson for application: stop over-correcting, and let a little mess live.
- Brows stay brushed-up and soft. Feathered, laminated-style brows continue to dominate, which keeps brow gels and flexible-hold pencils in every routine.
If you are building an eye line around these shifts, they translate directly into SKU decisions: coloured and brown liner ranges, tubing mascara formulas for the smudge-friendly “undone” look, and mascara wand types engineered for clump-free volume versus deliberate texture. Our formula development team can benchmark trending references against manufacturable specs.
Choosing the Right Eye Makeup Formula
A formula’s specs decide both how it wears and how it sells. The parameters that matter most:
- Pigment Loading: Professional eyeshadow formulas typically sit in the 15% to 20% pigment range. Higher loading supports intense colour payoff and reduces the number of passes needed on the lid.
- Oil-to-Powder Ratio: This balance determines texture and longevity. A precise ratio limits product fallout during application and reduces creasing across the day.
- Micronization Technology: Ultra-fine particle milling creates a silk-like texture. The process improves blendability and helps the shadow adhere evenly to the lid.
- Safety Standards: Compliance with Paraben-free and cruelty-free claims is required for most global markets, alongside the regulations of the destination country. We control this through documented raw-material sourcing, clean-room production, and batch testing.
| Product Category | Effect & Finish | Formulation Key | Manufacturing Focus |
|---|---|---|---|
| Pressed Eyeshadow | High-pigment matte or shimmer | Mica & Binder ratio | Micronization & pressing uniformity |
| Cream Eyeshadow | Metallic, dewy, or satin | Emollient-based stability | Oil-phase control & airtight filling |
| Vloeibare eyeliner | Precision sharp lines | Film-forming polymers | Viscosity testing & quick-dry balance |
| Volume Mascara | Thickness & lengthening | Wax & Fiber blend | Wiper compatibility & bulk synergy |
| Gel Eyeliner | Smudgeable yet water-resistant | Silicone-resin matrix | Volatile solvent sealing & texture |
Conclusie
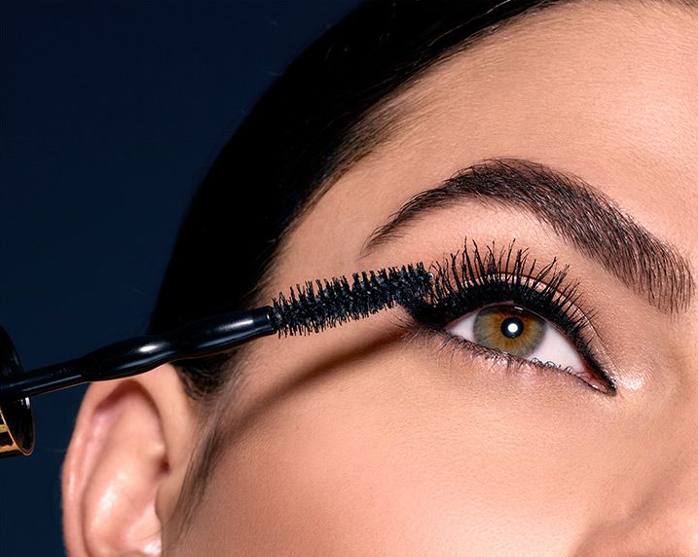
Getting good at eye makeup is mostly repetition in the right order: prep the lid, set the brows, build shadow in layers, place the line close to the lashes, and finish with two thin coats of mascara. Practise how to do eye makeup on these five steps and the muscle memory carries into every look beyond them.
If you are reading this as a brand owner, the same fundamentals shape your product brief: which finishes your market actually wears, which formats your price point supports, and which claims your dossier can defend in the country you ship to.
Veelgestelde vragen
How long should eye makeup take for a beginner?
Fifteen to twenty minutes is normal while you are learning, and most of that goes on blending. Once the order is familiar — brows, shadow, liner, mascara — a everyday look typically lands around five to eight minutes.
Why does my eyeshadow crease a few hours after applying it?
Natural oil on the eyelid breaks the pigment’s grip, and the shadow folds into the crease line. An eye primer sets a barrier between the oil and the pigment; a thin layer of translucent powder over it helps on very oily lids.
What is the standard pigment concentration for professional eyeshadows?
Professional-grade eyeshadows typically contain a pigment load of 15% to 20%. That range supports stronger colour payoff and better blendability than most standard retail formulas, while keeping the powder workable on the lid.
How do you keep eye makeup products from smudging?
Smudge resistance comes from film-forming polymers balanced against the volatile solvent content. Together they set a flexible, water-resistant layer that limits pigment migration across the day — which is why a liner needs a few seconds to set before the eye is fully opened.
Are your eye makeup formulations paraben-free and cruelty-free?
Our standard eye makeup base formulas are developed without parabens, and we source raw materials that comply with the regulations of the destination market. Final claims depend on the dossier for your specific formula and country, so we confirm them with you before the stability pass.